Advanced Image Mount wizard allows you to choose the drive, mount point, DVD region and adjust other additional parameters while mounting an image.
Advanced Image Mount is available along with the basic license.
Note that SCSI and IDE functionality is limited in Windows 10.
To go to the advanced settings while mounting an image, choose an image from the Images catalog and check Advanced Mount option from its contextual menu. Or choose Drives on the sidebar, or in the main window, and pick Advanced Image Mount, then choose the image file you want to mount:
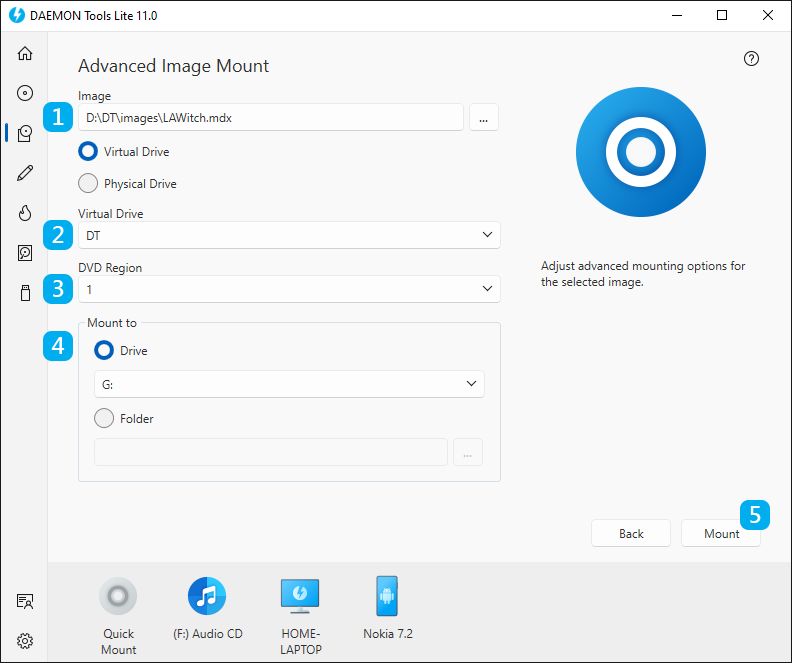
- Choose virtual or physical drive to mount. If virtual drive is chosen then:
- Choose the Type of the virtual drive. Note that some options are available only for SCSI and IDE emulation.
- Choose the DVD Region for the protected image.
- Choose how to Mount an image:
- Select a letter if you want to mount an image to Drive.
- Select a path to the empty folder formatted in NTFS file system if you want to mount an image to Folder.
- Click Mount button to start mounting or Back button to return to Images catalog.
Note, that once you reboot your PC, all the drives will unmount automatically by default. If you need them to stay after the PC is rebooted, you need to check Automount in Preferences — General.
If you want to mount to physical drive then:
- Choose the relevant option on the first step.
- Choose the physical device to attach your image to.
- Choose the bus type.
- Check Media priority option to show which disc — virtual or physical — will be defined by default if both are inserted.
- Click Mount button to start mounting or Back button to return to Images catalog.